
- Apr 11, 2025
How to Make 5 Simple Yet Touching DIY Birthday Gifts
Have you ever wanted to make a handmade gift for someone’s birthday but worried you’re not crafty enough?
The truth is, you don’t need to be a pro to create something meaningful. With simple materials and a bit of effort, you can absolutely make a touching and personal birthday present.
This blog will guide you through 5 handmade gift ideas that are super easy—even for beginners—with step-by-step instructions and easy-to-find supplies.
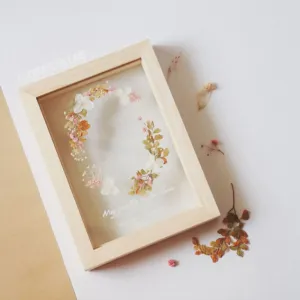
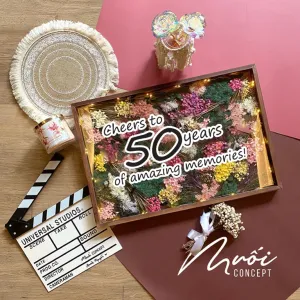
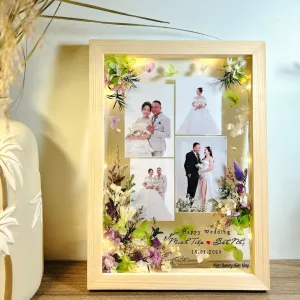
1. Wooden Photo Frame Decorated with Dried Flowers

Materials:
-
1 plain wooden frame (size 13x18 cm or 10x15 cm, rim at least 2 cm wide)
-
Small dried flowers (baby’s breath, lavender, mimosa) – choose 2–3 types to mix colors
-
Hot glue gun and glue sticks (or white glue and cotton swabs)
-
1 printed photo (a keepsake photo or a shot with the recipient) or a handwritten card
-
Optional: stickers, jute string, decorative tags
Steps:
-
Remove the glass from the frame if there is one, and clean the surface with a dry cloth.
-
Lay out the dried flowers on the frame to decide the layout before gluing. It's best to place them along one edge or corner to avoid cluttering the design.
-
Trim flower stems as needed. Dab glue on the base of the flowers and gently press them onto the frame.
-
Wait for the glue to fully dry (about 10 minutes), then insert the photo or handwritten card into the frame.
-
Decorate further with a “Happy Birthday” tag, jute string, or stickers to enhance the overall look.
Notes:
-
Choose a beautiful photo of you and the recipient on a special occasion, or a birthday from previous years.
-
You can also handwrite a small note along the border, like: “This birthday, I want to keep your smile here forever.”
-
Dried flowers are delicate. Hold them by the stem and avoid squeezing the petals.
-
Be cautious with the hot glue—too much heat can burn the flowers. Just dab a tiny amount at the base, and avoid prolonged contact with the petals.
Discover wooden frames with dried flowers on Chus:

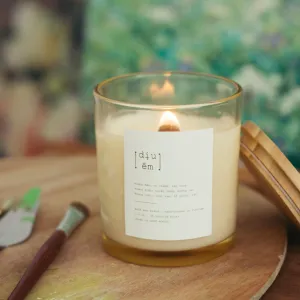
2. Handmade Scented Candle

Materials (for one 120ml candle):
-
100g soy wax flakes (small ones melt faster)
-
10–15 drops of essential oil (lavender, orange, cinnamon, etc.)
-
1 heat-resistant glass jar (wide mouth, flat bottom)
-
1 candle wick (wooden or cotton)
-
1 pair of chopsticks or a wooden clip to hold the wick in place
-
Optional: wax dye, decorative toppings like dried petals or citrus slices
Steps:
-
Melt the wax using a double boiler until completely liquefied (about 80°C).
-
Turn off the heat and add essential oil. Stir gently for about 30 seconds.
-
Fix the wick at the bottom of the jar using glue or a thin layer of wax. Hold the wick straight using chopsticks.
-
Pour the wax slowly into the jar—don't overfill. Keep the wick centered while the wax begins to set.
-
Let the candle cool naturally for 4–6 hours. Once fully hardened, trim the wick to 0.8–1 cm.
Tips:
-
Never melt wax directly over a flame—it can catch fire easily.
-
Pouring the wax at 65–70°C helps keep the surface smooth and prevents sinking.
-
If the surface sinks after cooling, use a hairdryer on low heat to even it out.
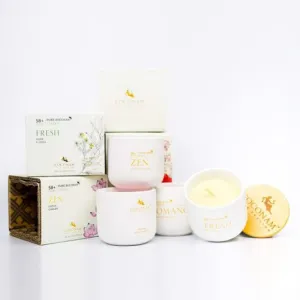
Explore handmade scented candles for meaningful birthday gifts:

3. Handmade Hanging Wax Sachets

Materials (for 3 pieces):
-
100g beeswax or soy wax
-
10–15 drops of essential oil (can mix two scents)
-
Dried flowers, citrus slices, cinnamon sticks (choose vibrant colors)
-
Silicone molds (round, oval, or square)
-
Thin ribbon (about 1cm wide)
-
Straw or skewer
Steps:
-
Melt the wax, then stir in the essential oils.
-
Pour the wax into the molds. After 30–45 seconds, sprinkle dried toppings over the surface. Don’t add too early or they’ll sink.
-
After 3–5 minutes, when the surface is slightly set, poke a hole near the top edge using a straw.
-
Let the wax harden completely, then remove from the mold.
-
Thread ribbon through the hole and wrap your handmade gift nicely.
Tips:
-
Use thick silicone molds so the wax doesn’t crack when removing.
-
When giving this as a gift, include a small handwritten card with usage instructions, or a personal note to make the handmade gift even more meaningful.
4. Mini Hand Embroidery in a Hoop

Materials:
-
Embroidery fabric or coarse cotton canvas
-
2–3 colors of embroidery thread
-
10cm embroidery hoop (wood or plastic)
-
Embroidery needle (size 24)
-
Disappearing ink pen to draw the design
Steps:
-
Stretch the fabric tightly across the hoop so it’s smooth and even.
-
Use the pen to draw a simple pattern—some ideas:
-
The recipient’s initials
-
A heart with a small phrase like “Happy Birthday,” “Be happy,” or “Shine bright”
-
Mini cake, tiny flowers, or quotes like “You’re enough”
-
-
Use backstitch for outlining—easy for beginners.
-
For small dot accents (like flower centers, eyes, etc.), use the French knot stitch.
-
Trim any excess fabric, fold and glue or sew the back to tidy it.
Tips for beginners:
-
Backstitch is the simplest and doesn’t require advanced skills.
-
Don’t pull the thread too tight—it might wrinkle the fabric.
-
If this is your first embroidery, start with basic shapes like a heart, an initial, or a number like “25” to celebrate their 25th birthday.
No time to embroider? Browse ready-made embroidered gifts on Chus:


5. Glass Jar with 100 Birthday Messages

Materials:
-
1 glass jar with lid (height 12–15 cm, wide mouth)
-
5 colored A5 papers, cut into 100 strips (1.5 x 5 cm)
-
Multicolor gel pens
-
Optional: thread, tags, stickers for decorating
Steps:
-
Cut the paper evenly into 100 small strips.
-
Write 100 notes divided into 5 categories:
-
20 things you love about the person
-
20 favorite memories
-
20 wishes for the future
-
20 funny quotes or jokes
-
20 sweet messages or teasing lines
-
-
Fold each strip (either in half or zigzag), or roll them up and tie with thread.
-
Drop them into the jar.
Decorating the jar:
-
Stick birthday-themed decorations like cakes, gifts, or balloons on the jar.
-
Add a paper tag with messages like:
-
“100 things I want to say to you – Happy Birthday [Name]”
-
“Happy Birthday – Open one a day to see how special you are!”
-
-
Tie a small ribbon or twine around the jar neck for a finished look.
Tips:
-
Use slightly thick paper to keep the folds neat, but not too stiff so it doesn’t unroll.
-
If you plan to film a clip of pouring the notes into the jar, place a towel underneath to reduce noise and prevent breakage.
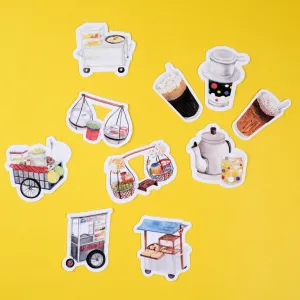
Looking for cute stickers and tags to decorate your jar? Check Chus!


Final Thoughts
We hope this blog gave you inspiration to make a handmade gift that’s easy yet deeply meaningful. Whether it’s a photo frame, scented candle, wax sachet, embroidery, or a message jar—what makes the gift unforgettable is the care and love you put into creating it.
Don’t have time to craft? You can still give a heartfelt present by choosing a handmade gift in Vietnam from Chus.vn, where every piece is created by talented Vietnamese artisans with soul and story.